Photo Tips to Attract House Hunters Online
Before coming to a home seller’s front door, homebuyers spend most of their time online checking out listings, scrolling through images and sizing up the competition. More than 90 percent of homebuyers start their search online, according to the National Association of Realtors 2015 Profile of Home Buyers and Sellers, which is why having show-stopping photos of a home is a must in this digital age.
While many sellers and real estate agents use professional photography to market the home, some are still throwing up dark, dingy, blurry images on the multiple listing services and other real estate websites, leaving much to be desired. Most people do not put enough time and effort into these photos, so when the bad images pop up online it’s not only doing a disservice to the seller, but it’s completely turning off buyers.
The more quality images representing the property exploit the home’s unique features and lifestyle, the more leads and buyer traffic the home will receive. It’s important to capture a few key areas in the home to promote the listing.
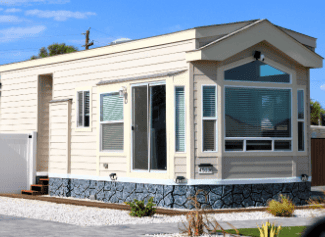
From the curb. The first shot in the listing should be a wide shot of the front yard and exterior. Take the photo from the curb to get the entire structure in the shot. Highlighting lively landscaping and features like shutters or a colorful front door is a plus.
Family gathering and entertaining areas. Next, snap some photos of the home’s gathering and entertaining areas. If the home has an open floor layout with multiple areas, then try and get an image of the entire space before going in for each room’s close up. In these pictures, make sure the areas are clean, clutter-free and promote furniture arrangements that maximize the room’s depth.
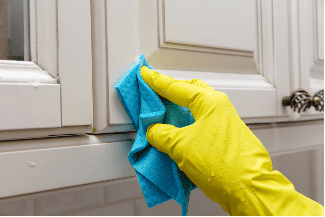
Heart of the home. The kitchen is one room that will lure buyers to your front door. So add a picture of it in the listing’s slideshow. Now, what if your kitchen isn’t updated? Put it this way, if the listing doesn’t have an image of the kitchen the buyers will most likely think, “Why?” No photo translates into outdated space. Plan on doing small repairs and clearing countertops to make it ready for picture day.
Master retreat. If you can, show all the home’s bedrooms, though the most important one to attract buyers with is the master retreat. Buyers want to know where they can relax and unwind. Make sure the bed is made and everything is up off the floor. When shooting this room the entire bed, and possibly even another seating area, should be framed up in the shot.
Baths. If the home has updated bathrooms, show them off. Like the kitchen, if a bathroom isn’t front and center in the listing slideshow, buyers ask why. Remove all personal hygiene products before the photo shoot, make sure the room sparkles – and please remember to keep that toilet seat down.
Work from home. The home office is becoming a popular room on many buyers’ wish lists, now that many of us can work remotely. If you have a home office, it’s a must to get a shot of the entire room with the desk surface clear of paperwork. This room has to look organized in the photo to inspire others to work here.
Backyard. The backyard is another popular amenity on a buyer’s wish list. Before shooting this area make sure the pool is clean, furniture has cushions and umbrellas are up. Show off the backyard patio, pool or outdoor kitchen as you would when entertaining. Plan on taking these images before winter, so buyers can imagine spending the summer in this backyard, as opposed to others.
If you have any other positive features or additional rooms your neighboring competitors don’t have, take a photo of those areas as well. Now, that you know what to shoot, let’s talk about how to shoot these images to get amazing quality:
Lighting. Try to shoot at dawn or dusk for the most flattering natural light. Make sure to turn on all the lights before shooting each room. It should be well lit to avoid dark corners. Open up blinds and drapes, but avoid backlighting. It’s critical to have the light from the window coming from the side or behind you to avoid glare or overexposing the room. Take a picture with and without the flash to see what works best in the room.
Angling the shot. Create interesting images by positioning focal points to the left or right of the frame away from center. Shoot a variety of shots from different angles – from above, below and at eye level. Professionals use a wide-angle lens to get the entire room in the image and a tripod to keep the shot steady.
It’s in the details. Plant yourself in every corner of the room and take the shot. The more images the better. Review every shot in the viewfinder to catch things that maybe your eye didn’t initially notice. Look at every detail and photograph some of the emotional connection points in each room. Use a photo editor like Photoshop or Canva.com to add the finishing touches on your photos.
Source: realestate.usnews.com


 Accessibility